Mocha Toffee Crunch Vegan Ice Cream

Mocha Toffee IceCream-2

Happy summer! It’s past Solstice now, and alternates here between pouring rain and hot hot sunshine. Which is OK – Edmonton in the summertime is pretty nice. I must be adapting to the heat this year, as only a few times so far have I felt like I would melt if I didn’t watermelon or a popsicle or ice cream into me ASAP.

Mocha Toffee IceCream-3

If you only and up making ice cream rarely this summer, this flavour is definitely a good choice: cool chocolate perked up by a touch of coffee flavour, contrasting with bits of crunchy toffee.

Mocha Toffee IceCream-4

I’ve included a toffee recipe that results in a candy that may seem rather oily, as that acts as the candy’s “raincoat” and prevents it from softening or getting soggy when mixed in to the ice cream. It’s a nice mix of contrasts and a lovely treat on a hot (or cold!) day.

Mocha Toffee IceCream-1

Mocha Toffee Crunch Vegan Ice Cream

By Agent Minty.

Ingredients: 

Ice cream base:

  • 1/4 cup corn starch
  • 1/3 cup brown sugar
  • 1/4 cup cocoa
  • 1c white sugar
  • pinch of salt
  • 1 3/4 cups almond milk
  • 1 Tbsp instant coffee powder
  • 2 cups canned coconut milk

Toffee Bits:

  • 1/3 cup blanched, slivered almonds
  • 3 Tbsp Earth Balance or other hard margarine
  • 2 tsp coconut oil
  • 2/3 cup white sugar
  • 1/4 tsp salt
  • 1 Tbsp golden syrup
  • 1.5 tsp water

Instructions:

  1. Whisk together corn starch, brown sugar, cocoa, 1 cup white sugar, salt, and 2/3 cup of the almond milk in a large saucepan. Heat on medium.
  2. Mix the instant coffee with about 3 Tbs of the remaining almond milk. Add to mixture in saucepan.
  3. Keep stirring mixture until sugar is dissolved and it starts to simmer. Turn down heat to medium-low.
  4. Keep stirring while slowly adding remaining almond milk, then coconut milk.
  5. Cook mixture until slightly thickened and glossy, about 5 minutes.
  6. Remove from heat, and cover surface with plastic wrap to prevent a skin from forming. after cooled slightly, refrigerate for at least three hours.
  7. Toast almonds in a ~350F oven for 2-5 minutes, until lightly golden, then remove to cool, and chop finely.
  8. Melt Earth Balance and oil in a small saucepan, then add sugar, syrup, water, and salt.
  9. Prepare a cookie sheet by lining with aluminum foil and tossing chopped almonds onto an area approximately 12×12 inches.
  10. Stir syrup on medium heat until sugar starts to dissolve, then add a candy thermometer and cook, undisturbed, until the syrup reaches Hard Crack stage (300-309 Fahrenheit).
  11.  Give candy one quick stir with a spatula, then pour over the almonds on the cookie sheet. Use the spatula to sweep any extra almonds onto the toffee area. You will get a thin puddle of candy smaller than the cookie sheet itself.
  12. Allow the toffee to cool for at least one hour before breaking into slivers.
  13. Freeze ice cream base according to instructions for your ice cream machine. Add in toffee bits for the last minute of mixing.
  14. Transfer to a plastic container and freeze overnight before serving.

Easy peaches-n-cream scones

PnC scone-1

So, it’s full-on holiday season for a lot of people around here. Many parties and so on. We had an fun party this weekend where a lot of sweet friends came over and became even sweeter after being coated in royal icing and candy to decorate gingerbread houses.

I don’t know about you, but I can feel pretty tired the next day, even if I haven’t had much to drink (probably comes from no longer being in my 20s, too). A lazy post-party Sunday can call for a slightly rich breakfast with very little effort. That’s when you should make these scones.

Peaches and Cream Scones

An original recipe by Agent Minty

Makes 12 large scones

Ingredients:

  • 2 cups + 1 Tbsp  (250g) all-purpose flour
  • 2 Tbsp white sugar
  • 4 1/2 tsp baking powder
  • 1/2 tsp salt
  • 1/2 cup (about 130g) drained canned peach segments, roughly chopped
  • 1/2 cup almond milk
  • 6 Tbsp coconut cream from a can
  • 1/2 tsp almond extract
  • 1/4 tsp vanilla extract
  • 3 Tbsp (45g) cold Earth Balance or hard margarine
  • 3 Tbsp (45g) shortening
  • 2 tsp white sugar
  • 1 tsp cinnamon powder

Instructions:

  1. Preheat over to 450F and line a baking sheet with parchment paper.
  2. Whisk together flour, 2 Tbsp sugar, baking powder, and salt.
  3. In a separate bowl, combine peaches, milk, coconut cream, and extracts.
  4. Using a pastry cutter or two knives, cut fat into the dry ingredients until the crumbs are the size of peas.
  5. Pour wet ingredients in and fold/stir gently until everything is combined. Dough will be quite wet!
  6. Plop the dough on the cookie sheet approximately 1/3-cup at a time, with 2 inches between each mound. Divide any remaining dough equally between all 12 scones.
  7. Combine sugar and cinnamon and sprinkle over scones.
  8. Bake for 11-12 minutes, rotating sheet once.
  9. Transfer to a wire rack to cool.

Triple Cookie-Splosion Ice Cream

CookieSplosion-4

Wow, it’s been hot around here. Sleeping with no sheets and wet hair to cool down, going through a litre of water on bike rides, running through the garden hose’s spray like a little kid kind of days.

CookieSplosion-3

You know how they say not to grocery shop hungry? Well, you also shouldn’t bike home on a hot day past an Oreo McFlurry billboard. Two days in a row. Or you’ll start getting ideas. This delicious monster came about from my fantasizing while finishing my ride home.

CookieSplosion-6

CookieSplosion-2

The ice cream base is your classic nostalgia white vanilla cream, but the three cookie types – oreos, peanut butter cookie dough, and spekuloos – balance it nicely and add enough crunch and chew to it. The spekuloos do double duty by also adding a mild bit of nutmeg-ish spice. Spekuloos are a Dutch crunchy store-bought cookie, also called windmill, Lotus, or Biscoff cookies. If you can’t find any, use store-bought gingersnaps. It’s important to use ones that are a bit “greasy”, as a low-fat or digestive cookie would go soggy in the ice cream.

CookieSplosion-1

Unlike my previous recipe, this ice cream is not instantaneous – the cooked mixture needs to cool completely before freezing, and then the churned mixture should be frozen for several hours before scooping. However, it scoops beautifully straight out of the freezer, and has a wonderfully soft texture. It’s well worth the wait.

CookieSplosion-5

Triple Cookie-Splosion Ice Cream

An original recipe by Agent Minty

Ingredients:

Ice cream base:

  • 1 cup white sugar
  • 1/8 tsp salt
  • 1 cup coconut milk
  • 1 1/2 cup + 1/4 cup + 1/2 cup almond milk, divided
  • 3 Tbsp corn starch
  • 3 Tbsp of alcohol (I chose half vodka and half amaretto)
  • 1 tsp vanilla

Cookie parts:

  • 3 large spekuloos cookies
  • 4 oreo cookies
  • 2 Tbsp margarine
  • 1/4 cup brown sugar
  • 2 tsp white sugar
  • 1/4 tsp vanilla
  • 1 1/2 Tbsp almond milk
  • 2 Tbsp peanut butter
  • pinch of salt, two pinches if peanut butter is unsalted.
  • 1/4 cup flour
  • 1 1/2 Tbsp chopped-up chocolate chips

Instructions:

Make ice cream base:

  1. Whisk together sugar, salt, coconut milk, and 1 1/2 cup almond milk in a saucepan over medium heat.
  2. Once sugar has dissolved, bring to a medium simmer.
  3. Meanwhile, whisk together corn starch and 1/4 cup almond milk in a small cup.
  4. Pour corn starch mixture into simmering base, while whisking continuously.
  5. Rinse cup with remaining 1/2 cup of almond milk and pour into the base.
  6. Whisk continuously while bringing back to a simmer.
  7. Cook while whisking for two more minutes.
  8. Remove from heat and cool at boom temperature for 15-30 minutes.
  9. Stir in alcohol and vanilla.
  10. Transfer to a bowl or similar and cover surface of cream directly with plastic wrap.
  11. Refrigerate overnight or for at least three hours until completely cold.
  12. Transfer to your ice cream maker and freeze according to manufacturer’s directions.

Prepare add-ins:

  1. Chop up cookies into small bite-sized pieces (about 1 cm across) and place in the freezer to chill for a few minutes while preparing other ingredients.
  2. Cream together all remaining ingredients except flour and chocolate chips. I used a soup spoon in a small bowl.
  3. Stir in flour and then chocolate chips.
  4. Form cookie dough into finger-thick logs and place in refrigerator to chill while ice cream is mixing.
  5. Once ice cream base is frozen, plop approximately 1/5 of it into your storage container, and sprinkle with 1/5 of the chopped cookies. Tear off four or five short pieces of cookie dough and add on top.
  6. Continue filling container by alternating ice cream and cookies, gently mixing a few times with a butter knife to ensure filling is more randomly distributed here. I found I only used half of the cookie dough, but you may use more based on your preferences.
  7. Freeze for at least three hours before serving.

CookieSplosionText

Instant Gratification Strawberry Ice Cream

icecream-1

Want some ice cream immediately? This recipe is great because as long as you have a freezer canister already frozen (I keep mine in the freezer at all times just in case), you can have ice cream from start to finish in about half an hour.

This recipe makes a strawberry ice cream pretty much identical to the stuff you’d find sold by the scoop at your local corner store – sweet, fruity, and bright pink. It uses the same type of secret ingredient that my tiger tail ice cream employed. One more ingredient note: if you don’t have a can of high fat coconut milk/cream waiting in the refrigerator, don’t worry. Just use the lower volume of almond milk to compensate for the extra water that will be in the can of coconut milk.

This is your sweet quick fix when it’s 30 degrees outside and all you want for dinner is ice cream. It’s made with staples most people already have in the fridge or pantry. And it comes out of the ice cream maker firm enough to eat right away. Now you have even fewer excuses to wait!

Instant Gratification Strawberry Ice Cream

An original recipe by Agent Minty

Makes about 3 cups of ice cream

Ingredients:

  • 1 can’s worth of coconut cream, watery portion drained off if you have chilled it beforehand.
  • 1 1/4 cups of almond milk, or 3/4 cup almond milk if the coconut milk was not separated.
  • 1/2 tsp strawberry Kool-Aid powder
  • 1/2 tsp vanilla extract
  • 1 Tbsp lime juice
  • pinch salt
  • 3/4 cup strawberry jam

Instructions:

  1. Add all ingredients to blender in listed order. Blend on high until completely smooth, about 2 minutes.
  2. Transfer to the canister of your ice cream maker and freeze according to the directions.
  3. Ice cream should get quite firm within about 25 minutes.
  4. Store any leftovers in the freezer.

Happy Canada Day!

Canada flag halifax 9 -04

I hope you get the chance to enjoy the day off (if you’re Canadian). I’m working in the lab to collect some data in the morning, then heading to a beer tasting with Mme. Minty and her friends.

Shortcake-1

Here’s a quick un-recipe for a red-and-white treat that’s perfect for celebrating our national holiday.

Strawberry Shortcake

Ingredients:

  • One batch of scones or quick biscuits. I recommend making my scone recipe, but adding an extra 2 Tbsp of sugar to the dry ingredients.
  • One can of coconut milk, mixed with a little non-dairy creamer or milk. You can use my whipped cream recipe and a stand mixer, or toss it all into a canister-style whipper, like I did for these pictures.
  • Lots of sliced fresh strawberries mixed with a bit of white sugar. I use 1 Tbsp per 1 cup of sliced strawberries, but adjust to your taste.

Instructions:

  1. Bake the biscuits and set aside to cool.
  2. Meanwhile, mix the strawberries and sugar and set aside at room temperature for at least an hour.
  3. Prepare your whipped coconut cream.
  4. Assemble by halving your biscuits, and layering them with strawberries and whipped cream.
  5. Repeat previous step until everything is gone and you have a bit of a stomach ache.

Shortcake-2

Vegan Greek No-gurt and Granola

Closeup Vegan Yogurt

I am exceptionally proud of this recipe. This will be a game-changer to those of you who love the creaminess of yogurt but choose to go animal-free. This is better than the chalky stuff that was available six years ago. This is creamier than the lumpy cultured soy product that’s been around for years. This is on par with the current coconut and almond yogurts, but with less sugar, refined and plant-based starches, and way more protein.

Don’t believe me? See the bottom of this post for a detailed nutritional comparison…. I won’t put it here to bore the people just looking for vegan food porn.

I’m working on a cultured version right now, but this stuff tastes just as good anyway.

Imagine it layered with fruit and cereal for breakfast. Smeared onto tacos instead of sour cream. Swirled into soups for awesome creaminess. Dive in!

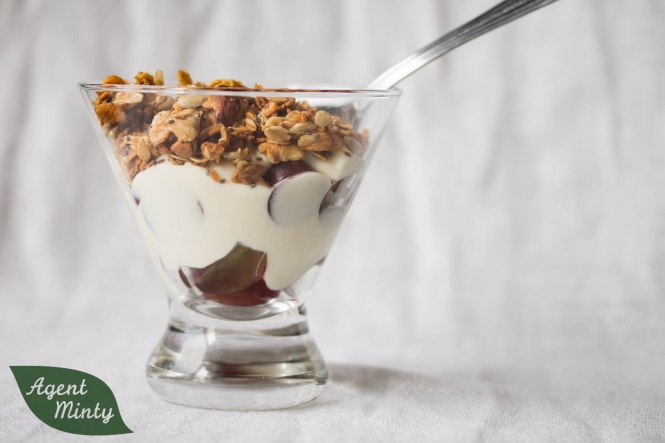
No-gurt and granola

I have also included a protein-packed granola recipe to go with it. It uses a hearty mix of seeds, grains, and nuts to keep you full.

A few notes about special ingredients:

The yogurt uses agar-agar, which I also used in my previous marshmallow recipe. This is an animal-free gelatine-like product, commonly used in asian desserts. It can be found at asian grocery stores, or at organic foods stores. You can buy flakes or powder. I prefer powder, as it is more precise to measure. My measurements are using powder, so if you can only get flakes, go by weight. It is assumed that you can use 3x the volume when subbing flakes for powder, but I have not personally tried this.

I use Soya Flakes, also called Rolled Soya, as a major ingredient in the granola. I’ve seen it online from Indian import stores, and from a british muesli store. If you’re Canadian and can get to a Bulk Barn, this is your best bet. If you can’t find soya flakes, no sweat. Use more old-fashioned oats, or try rolled Kamut flakes for a heartier crunch. I haven’t posted nutritional information for this recipe, as I suspect everyone’s choices will make macronutrient values vary.

Vegan Greek No-Gurt

An original recipe by Agent Minty

Ingredients:

  • 1/2 package traditional tofu (340g), not pressed
  • 1/4 cup coconut cream from a can – if you want less fat, use light canned coconut milk
  • 3 Tbsp +1/4 cup almond milk
  • 2 Tbsp lemon juice
  • 1 Tbsp maple syrup
  • 1.5 tsp (4g) agar-agar powder

Instructions:

  1. Puree tofu in a food processor or high-speed blender for at least one minute.
  2. Stir, scraping down sides of bowl, and process for at least another minute, until it is completely smooth to touch and taste.
  3. Add coconut milk, 3 Tbsp of almond milk, lemon juice, and maple syrup.
  4. Process for one more minute, scrape down bowl, and puree for another 10 seconds.
  5. Whisk agar powder into remaining 1/4 cup almond milk in a small saucepan.
  6. Heat on medium, stirring occasionally, until it comes to a gentle boil.
  7. Turn down heat and whisk continuously for another two minutes until the agar is completely dissolved.
  8. Take a spatula and scoop out approximately 1/4 of the tofu mixture into the agar mixture. Whisk well.
  9. Heat mixture for another 30 seconds, whisking continuously, then add another scoop of tofu mixture to the pot as before.
  10. Remove agar-tofu mixture from the heat. Start running food processor.
  11. Slowly transfer the warmed mixture into the running food processor.
  12. Process for another two minutes, until smooth and slightly cooled.
  13. Place the mixture into the refrigerator for 20-40 minutes (I just place the bowl of the food processor straight into the fridge).
  14. Once the mixture has solidified, return to the machine and process for 30-60 seconds until smooth.
  15. Store in a sealed container in the refrigerator for up to ten days.

High-Protein Granola – An original recipe by Agent Minty

Ingredients:

  • 1 2/3 cup old-fashioned rolled oats
  • 3 Tbsp raw pumpkin seeds
  • 2.5 Tbsp fine, unsweetened shredded coconut
  • 1 Tbsp chia seeds
  • 6.5 Tbsp sunflower seeds
  • 3/4 cup raw cashews, broken into smaller pieces
  • 1/4 roughly chopped raw almonds
  • 2/3 cup rolled soya flakes
  • 3 Tbsp melted coconut oil
  • 1/3 cup maple syrup (If not vegan, can substitute half volume for creamed honey)
  • 1/4 tsp nutmeg
  • 1/4 tsp cinnamon
  • 1/4 tsp salt

Instructions:

  1. Preheat oven to 300F.
  2. Combine oats, soya, coconut, seeds, and nuts in a large bowl.
  3. Combine coconut oil, maple syrup, spices, and salt in a microwave-safe bowl.
  4. Microwave oil mixture on medium power for 30-60 seconds, until it is runny.
  5. Stir liquid mixture briefly, then pour over dry oat mixture.
  6. Mix with a wooden spoon until all dry ingredients are lightly coated.
  7. Spread on a baking sheet lined with parchment paper.
  8. Cook for 10-15 minutes, until mixture is fragrant and nuts/seeds are lightly toasted.
  9. Cool for an hour before breaking granola into small clumps.
  10. Store in a sealed container at room temperature.

20140525-IMG_3292

 Nutritional Comparison

My No-gurt:

125 mL (1/4 of recipe) has:

  • 120 calories, 7g total fat, 1 g saturated fat, 6 g carbs, 4 g sugar, 7 g protein, 13% RDA Calcium, 10% RDA Iron

A popular brand of coconut yogurt (using full-fat coconut cream):

125 mL (calculated from 175 mL serving on label) has:

  • 100 calories, 3.6 g total fat, 3.2 g saturated fat, 16.4 g carbs, 5 g sugar, 1.4 g protein, 25% RDA Calcium, 4.2% RDA Iron

A popular brand of almond yogurt:

125 mL (calculated from 175 mL serving on label) has:

  • 71 calories, 4.3 g total fat, 0.4 g saturated fat, 9.3 g carbs, 5 g sugar, 2.1 g protein, 28.6% RDA Calcium, 2.8% RDA Iron

A popular brand of cultured soy product:

125 mL (calculated from 170 mL serving on label) has:

  • 107 calories, 2.1 g total fat, 0 g saturated fat, 17.9 g carbs, 10.7 g sugar, 3.57 g protein, 10.7% RDA Calcium, 1.1% RDA Iron

Yes, mine has more calories and more fat than the others, but it tastes awesome… and the protein is great if (like me) you’re trying to put on muscle in the gym!

Christmas Ice Cream – Candy Cane Crackle

Canadian readers will probably be familiar with President’s Choice Candy Cane ice cream. It came out in 1995 and was immediately my favourite ice cream ever. Rich vanilla ice cream with chunks of candy cane and ribbons of hard chocolate that crackled when you scooped some out. Our whole family looked forward to eating it for dessert in December. It underwent a redesign about five years ago and hasn’t been the same since – now the ice cream is minty, there are red and green globs of candy instead of broken candy canes, and the ice cream itself isn’t as rich. I don’t have a picture of the old version, but here’s what it looks like now:

PC brand - little red paperclip

I have tweaked the recipe over the past two years until it is as creamy and crackly as I remember. It is with pride that I’m sharing it with you now… hopefully it will be a Christmas favourite with your family, too!

IMG_2558

Christmas Crackle Ice Cream

The vanilla base is modified from the French Vanilla ice cream in Hannah Kaminsky’s Vegan a la Mode, but the rest of the ideas are my own. Note that this recipe makes a large batch of ice cream – lots to share!

Ingredients:

  • 5 1/2 Tbsp Bird’s custard powder (for whiter ice cream, use half custard powder and half corn starch)
  • 1 cup soy milk or almond milk
  • 3/4 cup white sugar
  • 2 cups almond milk
  • pinch salt
  • 1 can gold (high-fat) coconut milk, left in a cool place to separate
  • 3/4 tsp vanilla paste, or 1 tsp vanilla extract
  • 3 Tbsp vodka
  • 1 Tbsp coconut oil, or shortening
  • 6 Tbsp chocolate chips
  • 3/4 to 1 cup of crushed green and red candy canes (red only is fine, the addition of green is just prettier to me)

Instructions:

  1. Whisk the custard powder and 1 cup of milk in a saucepan until thoroughly dissolved.
  2. Stir in the sugar.
  3. Slowly warm the mixture on low to medium heat, whisking the whole time.
  4. Once the sugar has dissolved, bring heat to medium.
  5. Add in remaining almond milk and salt.
  6. Stir until the mixture thickens.
  7. Meanwhile, scoop out fatty portion of coconut milk (should be 1 1/4 to 1 2/3 cups) and microwave for 30 seconds to soften.
  8. Once the mixture on the stove is the consistency of a light pudding, take off the heat.
  9. Stir in coconut milk and vanilla.
  10. Allow to cool for 10 minutes, whisking occasionally.
  11. Add in vodka.
  12. Cool for at least two hours, stirring occasionally to break up the “skin” that forms.  If you forget to stir, just whiz the mixture for a few seconds with an immersion blender before freezing.IMG_2533
  13. Pour the chilled mixture into your ice cream maker and freeze until the ice cream is quite stiff.
  14. Meanwhile, melt together the chocolate chips and coconut oil
  15. Add the crushed candy canes and mix in the ice cream maker for only about one minute. Adding the candy canes too early will allow them to bleed – you’ll get grey ice cream!
  16. Scoop out about half a cup of ice cream, drizzle melted chocolate in thin strings on top. Aim for thin layers!IMG_2543
  17. Repeat until all of the ice cream is used up. You’ll have a little chocolate left over.
  18. Freeze for at least two hours.

Enjoy! Merry Christmas!

ice cream closeup

Peanut Butter Chocolate Hi-Hat Cupcakes

Love chocolate and peanut butter together? So do I. Yum. However, I’m not a huge cupcake fan. I’ll eat them, sure, but if I’m making something for myself, I would more likely make a tart, ice cream, candy, or cookies. I made these for a lab meeting at work, though, and my colleagues love cupcakes – especially any featuring chocolate.

Sink your teeth into these chocolatey cupcakes topped with whipped peanut butter icing and chocolate shell.

IMG_1483

So yummy… when you bite into them, you get a creamy, nutty surprise:

IMG_1480

These would be perfect for a fancy occasion like a birthday party or for a potluck.


Agent Minty’s Peanut Butter Hi-Hat Cupcakes

Makes 18 medium cupcakes

Quick rich chocolate cupcakes (modified from Joy of Cooking)

  • 2 1/4 cups of white flour
  • 1 3/4 cups white sugar
  • 9 Tbsp cocoa
  • 1 1/2 tsp baking soda
  • 1/8 tsp salt
  • 1.5 cups cold water
  • 1 Tbsp instant coffee granules
  • 6 Tbsp canola oil
  • 1.5 Tbsp balsamic vinegar
  • 2 tsp vanilla
  1. Whisk together flour, sugar, cocoa, baking soda, and salt in the bowl of a stand mixer.
  2. Combine water, coffee granules, oil, vinegar, and vanilla
  3. Pour liquid ingredients into dry and mix until smooth.
  4. Pour into cupcake liners.
  5. Bake at 350F for 17-19 minutes, until a toothpick comes out clean.
  6. Allow to cool for at least 45 minutes.

Peanut butter whipped frosting

To get the creamiest consistency, I recommend using the cheap no-stir homogenized peanut butter. I use the natural stuff on my toast, but it’s famous gritty texture will interfere with your frosting here.

  • 3 1/2 Tbsp margarine (any kind is fine)
  • 2.5 Tbsp of smooth peanut butter
  • 3/4 tsp vanilla
  • 1/2 tsp almond extract
  • 3 1/3 c icing sugar
  • 5 Tbsp almond milk
  1. Cream together the first four ingredients.
  2. Add in icing sugar 1 cup at a time, alternating with milk.
  3. Whip until a mousse-like texture has been achieved
  4. Transfer to a piping bag with a large tip  and place a large dollop on top of each cupcake.
    • Alternatively, use a spoon or a freezer bag with the corner cut off.
  5. Freeze topped cupcakes for at least one hour.

IMG_1455

Chocolate shell

Try to make this in a 2-cup container – wide enough to fit your fingertips, and deep enough to fit the frosted top of the cupcake. You will end up making more chocolate sauce than you will need. Try Adding extra coconut oil to the leftovers to make your own Magic Shell topping for ice cream.

  • 2 cups of vegan chocolate chips, divided
  • 2.5 Tbsp coconut oil, divided
  1. Melt half of each ingredient together in a heat-proof container in your microwave (3 30-second bursts should do it).
  2. Take a frozen, topped cupcake and dip into the chocolate sauce.
  3. Drip off the extra.
  4. While the chocolate is still wet, place on any decorations you want. I used salted roasted peanuts.
  5. Return cupcakes to the freezer, or keep out for immediate consumption.
  6. Allow cupcakes to thaw for 2 hours before serving. They will stay good for about 10 hours at room temperature, but the chocolate shell will get a little soft.

IMG_1462 IMG_1464 IMG_1466 IMG_1467 IMG_1468 IMG_1469

By the way, sorry for the lack of budget or healthy eating posts lately. With my busy schedule, most of my meals have been repeats of the staples – vegan homemade wieners, bean salad, spaghetti, or tinned soup. Cheap, yes, but not so interesting. We have a two-week break in the renos while we wait for a new counter, so hopefully in the meantime I’ll get inspired to document some weeknight cooking!

Tiger Tail ice cream – Vegan Potluck 2013 contribution

vvpLOGO

Hello Vegan Potluck visitors! It’s finally starting to warm up in Edmonton – last week we still had intermittent snow, but this week I could see a transformation across campus. People were wearing shorts and skirts, t-shirts and polos instead of jeans and sweaters. We have recently had several days with temperatures in the high twenties, and nothing’s better to complement a hot day than a scoop of cool ice cream.

Orange and black ice cream

Tiger Tail is a nostalgic flavour for me. I remember trying it for the first time when I was about six, when my family had walked to the corner store for ice cream cones. I liked the combination of tangy orange and interspersed with liquorice (yes, I was the kid that always liked black jelly beans).

Mrs Minty hadn’t had Tiger Tail ice cream in over a decade until we came up with this recipe together several months ago. This recipe uses my top-secret ingredient for intensely fruit-flavoured ice creams, icing, and cakes. Ready? It is…..

Kool-Aid Packet

OH YEAH!!!!

Yep. Kool-Aid. If you’re the kind of person who abhors artificial colours and flavours, this ice cream probably isn’t for you. I originally tried to make an ice cream base using orange juice instead, and it just doesn’t take like the commercial stuff. Go ahead, double down and use the kool-aid powder, as well as the black food colouring in the liquorice ribbon. It tastes like childhood!

Tiger Tail Ice Cream – Original recipe by Agent Minty

It requires about half an hour of work the night before you intend to freeze the ice cream, and I would advise making the two components sequentially, or having a partner help you – both the caramel and “milk” bases need to be stirred at about the same time.

Milk base

  • 3 cups of almond milk, divided
  • 3/4 cup white sugar
  • 1/8 tsp salt
  • 1/4 c corn starch
  • 1 398-mL can old premium coconut milk, shaken, minus 1/2 cup (so ~1 cup +1 Tbsp)
  • 1/4 tsp vanilla
  • 1/4 cup Cointreau or other orange liqueur
  • 1 1/2 Tbsp lemon juice
  • 1 1/4 tsp-2 tsp orange Kool-Aid powder
  1. Combine the sugar and 1 1/2 cups of almond milk in a large saucepan. Heat on medium until sugar has dissolved, about 5 minutes.
  2. Meanwhile, combine 1/2 cup of almond milk and the corn starch in a small bowl, whisking until all the lumps are dispersed.
  3. Once the sugar/milk mixture has come to a boil, turn the heat  down to keep it at a simmer.
  4. Add the cornstarch/milk mixture, whisking vigorously.
  5. Cook, still stirring, until it reaches the consistency of a light pudding/custard.
  6. Add the remaining almond and coconut milks, whisking continuously.
  7. Once the mixture has started to lightly simmer again, remove it from the heat.
  8. Add in the vanilla, Cointreau, and lemon juice.
  9. Add the Kool-Aid powder. I found that  1 1/4 tsp gave me a good flavour and colour, but if you need something that’s violently coloured, add more. Taste the mixture as you go, to make sure it is satisfactory.From this....                                          into this!
  10. Strain the hot mixture through a mesh sieve (to remove any corn starch lumps).
  11. Refrigerate overnight or until cold to the touch.
  12. Freeze the base according to your ice-cream maker’s directions. If this is your first time making ice cream, don’t get distressed if the mixture is about the consistency of soft serve ice cream. That’s normal, and it will harden up in the freezer.

    This is ready to freeze.

    This is ready to freeze.

  13. Layer with the liquorice ribbon as described below.

Liquorice ribbon

  • 1/4 cup water
  • 1/2 cup white sugar
  • 1/2 cup coconut cream (reserved from the can used for the milk base)
  • 1 Tbsp anise extract
  • Black paste-style food colouring
  • 1 Tbsp molasses
  1. Combine the sugar and water in a heavy-bottomed saucepan.
  2. Cook at medium-high without stirring. The sugar will dissolve in the water. and begin to boil.

    The syrup is boiling. Do not stir!

    The syrup is boiling. Do not stir!

  3. The clear sugar syrup will begin to heat up (warning: this is very hot can will burn if you touch it!). Allow it to cook undisturbed until it starts to become a light amber colour.
  4. Swirl the pot gently, without stirring, until it becomes a dark caramel colour (think the colour of a Werther’s, or dark brown sugar).
  5. Combine the anise extract and milk.
  6. Add the anise milk to the syrup. This will splatter a bit!
  7. Stir virgorously until smooth.
  8. Scrape out a small lump of black food colouring (I used about 1/3 of 1/8 tsp). Stir into the hot caramel. This may take a while to disperse.
  9. Stir in the molasses.
  10. Store in a fridge overnight.
  11. Before combining with the milk base, leave out for a few hours or microwave on low power until the caramel is room temperature.

IMG_1426IMG_1428

IMG_1435IMG_1436

Layering the ice cream

  1. Use a plastic container to store your ice cream. You will need once with a volume of at least 1.5 litres.
  2. Scoop out approximately 1/5 of your just-frozen ice cream into the container. Smooth it out on an angle.
  3. Drizzle 1/4 of your liquorice caramel on top.
  4. Add another layer of ice cream and more caramel, repeating until both are gone. This doesn’t have to be perfect.
  5. Cover your ice cream with plastic wrap and gently press down to unite all the layers.
  6. Refrigerate for at least 3 hours before scooping, preferably overnight.

Thanks for stopping by as part of the Virtual Vegan Potluck! Enjoy every taste of the upcoming summer!

Orange and black ice cream

To visit the blog that precedes mine in the Potluck, click here!
I’m the last post! To visit first blog in the potluck, please, click here!
To go to the homepage of the potluck, click here!

Also, there was a bit of a mix-up and I’m still listed in the middle of Main Courses.

To see the main course “after” me, click here!
To see the main course “before” me, click here!

Visiting the in-laws and accommodating diverse dietary needs

We drove last week to visit sunny Cranbrook, BC and stay with my in-laws for the Easter long weekend. Unlike our hometown, which was covered in a foot of slushy snow when we left, the ground there was already thawed and I could see bight green lilac buds out of the kitchen window.

My mother-in-law is trying to avoid many foods to control some health issues. Any shared food should be vegan (Mrs. Minty’s needs), gluten-free, and without nightshades (tomato, pepper, eggplant), chocolate, or citrus (for MIL). Some things will have to be separated, as my in-laws need meat at least once a day while we still need protein, so for one dinner we had Shish Kebabs, allowing each person to pick only the foods that keep them happy and healthy.

IMG_1295

Veggie shish kebabs

I pressed some firm tofu and marinated it in a dijon mustard, herb, and wine vinegar mix. Everyone could choose from mushrooms, sweet potato cubes, pineapple, onion, or zucchini.

For dessert, we some homemade sweets.

My MIL has the sweet philosophy of “my kitchen is your kitchen,” so while she was at work and her husband and Mrs. Minty were running errands I made fudge. This is sometimes called Maple Fudge, but has no maple. It is made from (coconut) cream and brown sugar, plus a few other things. The hard part is waiting an hour and a half for the cooked sugar to cool before beating it. In the meantime, your whole house will smell heavenly!!

The fudge isn’t healthy, but I think it’s fine to eat anything in moderation. It isn’t exactly inexpensive, either… a batch will cost about $5 for supplies, including the walnuts. However, it’s WAY cheaper than stuff you buy at a candy store, and darn impressive!

Brown Sugar Fudge (“Caramel Cream Fudge” from the original Joy of Cooking):

Note: you WILL need a candy (not meat) thermometer, which is big and glass and can be found in most grocery stores. You SHOULD use a stand mixer for step #8, unless you want Popeye arms.

  • 1 cup brown sugar
  • 1 cup white sugar
  • 1/8 tsp salt
  • 1/3 corn syrup (the easiest way to measure is to put your pot on a scale and measure 80g of corn syrup into it)
  • 1 cup coconut cream
  • 2 Tbsp margarine
  • 1 tsp vanilla paste (vanilla extract is OK, too)
  • 1/4-1 cup chopped walnuts

1. Combine both sugars, syrup, salt, and milk in a large heavy saucepan.

2. Heat on med-hi, stirring, until it comes to a boil.

3. Cover and cook 2-3 minutes.

4. Remove lid, clip on a candy thermometer and turn heat to medium (or med-lo if you have cheap, thin pots).

5. Cook WITHOUT stirring until the thermometer reads AT LEAST 234 Farenhiet . Try to catch it at no more than 240F, as if it gets hotter the resulting fuge will be more brittle and grainy.

This cooking step can seem to take forever. Just wait. Don’t stir it or you might start sugar crystallization, resulting in poor quality fuge. This is the point where you will be happy you used a big pot so that the boiling sugar doesn’t splatter all over you and the stove.

6. Meanwhile, put the margarine in the bottom of the bowl for your stand mixer.

7. Once the fugdey syrup is the right temperature, pour it into your mixing bowl on top of the butter. STILL DON’T STIR!!! Allow it to cool until it is no more than lukewarm (at least 1 hour, maybe 2).

8. Add the vanilla and stir. I use the paddle attachment of the Kitchen-Aid and lock in the bowl, and mix on high speed. If you try to use one of those hand-held mixers, you will probably burn out its motor. I have successfully stirred fudge by hand with a wooden spoon. It was not fun.

9. Keep on stirring until you suspect that your fudge is a failure. Keep on stirring. Suddenly it will no longer be shiny, but instead be a nice opaque tan colour.

No longer shiny.

No longer shiny.

10. Joy of Cooking recommends stirring in 1 cup of walnuts at this point. One of my relatives dislikes walnuts, so I did not. Put your fuge into a pan that has been liberally greased and lined with parchment paper. It’s OK if the fudge doesn’t meet the edges of the pan.

11. I added walnuts on top of half of the fudge and pressed them in.

IMG_1292

Waiting for it to firm up!

12. Allow to set for an hour and cut into small squares. People say it can last a week tightly sealed, but no fudge has ever lasted that long in our home.